Home
Beauty
Your Step-By-Step Guide To A Flawless Smokey Eye
A smokey eye is a captivating makeup technique characterized by sultry, blended hues that create depth and drama around the eyes. Designed to enhance natural beauty, this look makes the eyes appear more significant and defined while adding an alluring touch to any makeup application. Versatile by nature, the smokey eye seamlessly transitions from casual outings to elegant evening events. Whether paired with a soft lip for brunch or bold lipstick for a night out, it complements various styles and occasions.
A smokey eye is a captivating makeup technique characterized by sultry, blended hues that create depth and drama around the eyes. Designed to enhance natural beauty, this look makes the eyes appear more significant and defined while adding an alluring touch to any makeup application. Versatile by nature, the smokey eye seamlessly transitions from casual outings to elegant evening events. Whether paired with a soft lip for brunch or bold lipstick for a night out, it complements various styles and occasions.
For makeup enthusiasts, mastering the smokey eye is an essential skill that unlocks a realm of creativity and self-expression. This comprehensive guide will empower you to perfect this beloved technique, ensuring you shine at every event you attend!
Understanding Eye Shapes
Achieving the perfect smokey eye hinges on understanding your unique eye shape. This is crucial for tailoring the technique to enhance your natural beauty. The three primary eye shapes—almond, round, and hooded—demand different approaches for optimal results.
Almond-shaped eyes are versatile and can be worn in various smokey styles. Consider extending the shadow towards the outer corners for a dramatic effect for this shape.
Rounded eyes, on the other hand, benefit from a focus on elongation. Applying a dark shadow on the outer corners while using lighter shades in the inner corners can create a more balanced look, preventing the accentuation of roundness.
Hooded eyes, characterized by a fold of skin that may obscure the crease, require careful technique. Applying the smokey colour slightly above the crease creates the illusion of depth and definition, making them appear more open.
When choosing the right smokey eye style, assess your eye shape thoughtfully. Almond eyes can experiment with bold colours, while round eyes should concentrate on elongating shadows. For hooded eyes, focus on blending techniques that elevate and define without overpowering the eye area.
Essential Tools And Products
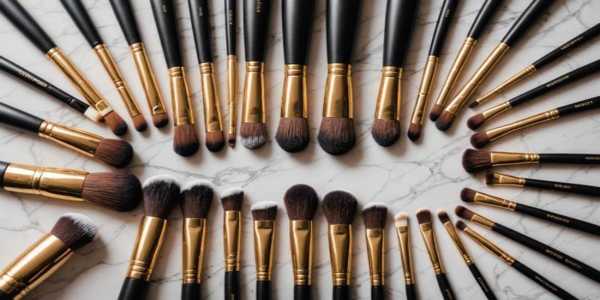
The right tools and products are essential to achieving the perfect smokey eye. Begin by investing in high-quality brushes: a flat eyeshadow brush for packing colour onto the lid, a fluffy blending brush for seamless transitions, and a small pencil brush for detailing. A quality sponge for applying concealer or eyeshadow should not be overlooked.
An eyelash curler is also a worthwhile addition to your makeup kit. This tool helps to lift and open up your eyes, enhancing the overall drama of your smokey eye look.
In terms of products, consider a variety of eyeliners, including gel and liquid formulas, to create different effects—gel for softer lines and liquid for precise application. Eyeshadow palettes with neutral and dark shades are ideal; seek combinations featuring colours like blacks, greys, and deep purples for versatility.
Finally, blending products such as setting sprays or powders can help achieve that smooth finish.
When selecting colours, factor in your skin tone and eye colour. More fabulous shades like taupes and silvers work well for lighter skin tones, while darker individuals can pull off richer shades like charcoals and deep browns. Furthermore, purple tones are particularly flattering for green and hazel eyes, while warm tones can effectively accentuate blue eyes.
Equipping yourself with these essential tools and products will enable you to quickly create stunning, smokey-eyed looks.
Step 1: Prepping Your Eyes
Creating a beautiful smokey eye begins with a clean canvas to ensure colours blend seamlessly and last throughout the day. Start by applying a practical eye primer, like the Urban Decay Eyeshadow Primer Potion, renowned for its long-lasting and crease-free hold. This primer enhances the vibrancy of your shadows and acts as a barrier against oils and sweat, keeping your look fresh all day.
Next, focus on the concealer, crucial in refining the eye area. Choose a lightweight, buildable concealer that matches your skin tone. Apply a small amount under your eyes using your ring finger, dabbing gently to avoid tugging the delicate skin. This technique will brighten your eyes while concealing dark circles or imperfections. Also, consider applying concealer to the eyelids to create an even base for your shadows.
Starting with these foundational steps will set the stage for an impeccable smokey eye masterpiece.
Step 2: Applying The Base
The first layer in creating a flawless smokey eye involves applying a neutral base shade across the eyelid. This base serves as a canvas, enhancing the layers of colour that follow and facilitating smooth blending. Select a shade that matches your skin tone or is slightly lighter, enabling the deeper colours to stand out without looking harsh.
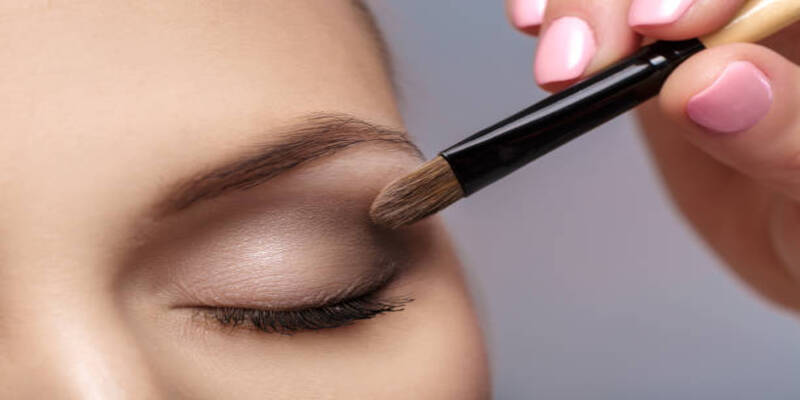
Using a flat brush or your fingertip, gently dab the base shade onto the centre of your eyelid. Then, spread it from the inner to the outer corner, continuing to the crease to cover the entire mobile lid area. For even application, avoid pressing too hard; gradually build the colour.
Blending is crucial for a polished finish. Take a clean, fluffy brush to softly buff the edges of the base shade into the skin. This process will eliminate harsh lines, creating the smooth transitions that are the hallmark of a successful smokey eye. Remember that patience is essential; spend time perfecting your blend for a professional-level finish.
Step 3: Introducing Depth
Choosing the right darker shade for your crease adds depth to your smokey eye. Opt for a hue that complements your base colour, usually one or two shades darker. For instance, if you're starting with a soft taupe, a deep grey or charcoal would complement it beautifully. Test it on your wrist to ensure the colour doesn't overpower your eyes. Remember, building up colour is often easier than removing excess product.
Use a fluffy blending brush to apply the darker shade evenly. Begin at the outer corner of the eye and work inward, following the natural contour of your crease. Employ windshield wiper motions back and forth to deposit the colour gradually. To blend effectively, make circular motions at the edges to soften harsh lines. Patience is crucial—blending is key to achieving that seamless transition between shades.
To avoid harsh lines, always transition from lighter to darker shades, starting with the lightest on your lids and layering darker colours sequentially in the crease. If you notice harsh lines, use a clean blending brush to gently go over the edges or use a bit of the original lid colour to soften any imperfections.
With these techniques, you'll achieve a beautifully blended smokey eye that highlights your eye shape and adds captivating depth to your look.
Step 4: Creating The Smokey Effect
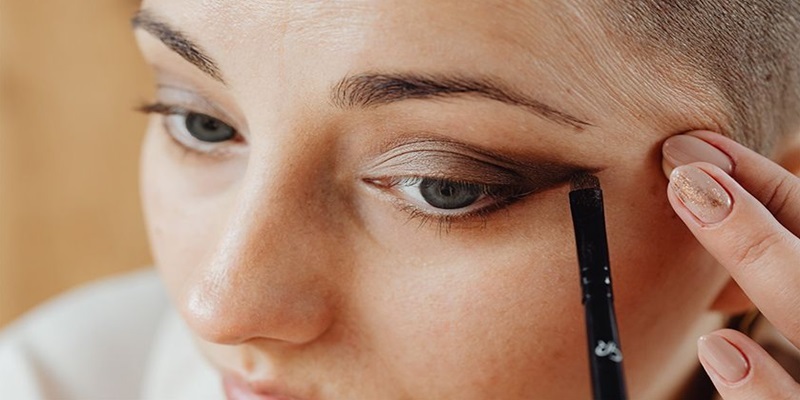
Mastering the smokey eye involves a seamless transition from the crease to the outer corner. To achieve this, take your dark shade with a fluffy blending brush. Position your brush at the outer corner of your eye and apply the product using gentle circular motions. Gradually blend the colour inward, extending it along the crease and slightly toward the brow bone. Keep the darkest concentration at the outer corner; this creates the depth and dimension that define the look.
Next, refine your eyeliner application for maximum impact. Start with tightening, which entails applying eyeliner to the upper waterline. This approach achieves a fuller lash line, enhancing the smokiness without being overpowering. Use a softer pencil liner on the lower waterline and smudge it for a more diffused effect.
Blending out the edges where the dark shadow meets your lid colour is imperative. Use a clean brush to diffuse harsh lines with soft, sweeping motions gently. Remember, the secret to a flawless smokey effect lies in the blending process, so take your time. Keeping the edges soft creates a dreamy finish that elevates your smokey eye from simple to stunning!
The careful attention to detail in each step transforms your makeup look and highlights your artistry, making the smokey eye an accessible yet sophisticated choice for any occasion.
Step 5: Finishing Touches
Adding the final embellishments to your smokey eye is essential to achieve a dramatic effect. Start with mascara; this enhances your lashes, making them appear fuller and longer and providing a beautiful contrast against dark eyeshadow. For a dramatic look, false lashes can significantly elevate your appearance by adding volume and length, creating an eye-catching statement.
Remember to illuminate your eyes for additional brightness. Highlighting the inner corners and brow bone brightens your eyes while adding dimension and openness. Opt for a finely milled highlighter or light eyeshadow applied in these areas for a stunning difference.
To ensure your smokey eye lasts throughout the day, incorporate a long-lasting eye primer before applying any eyeshadow. Additionally, using a translucent powder can lock in your eyeshadows. A quick spritz of setting spray will seal everything, allowing you to maintain your captivating look from dawn to dusk.
With these finishing touches, your smokey eye will undoubtedly be the head-turner you envisioned!
Troubleshooting Common Mistakes
Creating the perfect smokey eye can pose challenges, and common mistakes often produce subpar results. One frequent issue arises from using muddy colours, typically due to layering similar hues without sufficient contrast; the result can quickly appear flat and lack depth. To avoid this, always blend a dark shade with a mid-tone to create dimension, ensuring smooth transitions to lighter colours towards the brow bone.
Another common mistake is uneven blending, which results in harsh lines that can detract from your overall look. Invest in a good blending brush to rectify this and utilize circular motions to diffuse sharp edges. If discrepancies arise, gently tap on more eyeshadow to build the colour and blend it again to soften mistakes.
Finally, remember that mastering the smokey eye requires practice. Experiment with various colour combinations and techniques in a relaxed environment to hone your skills. The journey to achieving a flawless smokey eye is one of exploration and creativity; enjoy the process!
Embrace The Art Of The Smokey Eye
The smokey eye stands as a timeless embodiment of creativity and artistry in makeup. It offers endless opportunities for blending and layering, allowing makeup enthusiasts to express individual styles through each application. As you embark on your journey to perfect the art of the smokey eye, remember to practice, experiment, and adapt the look to reflect your unique aesthetic. Embrace makeup's joyful and transformative power—it's not merely about looking good but celebrating your individuality through artistry. Now, go ahead and let your creativity shine with every stroke of your brush!
